Posted on

Feed your Hair | Eat this for strong healthy hair

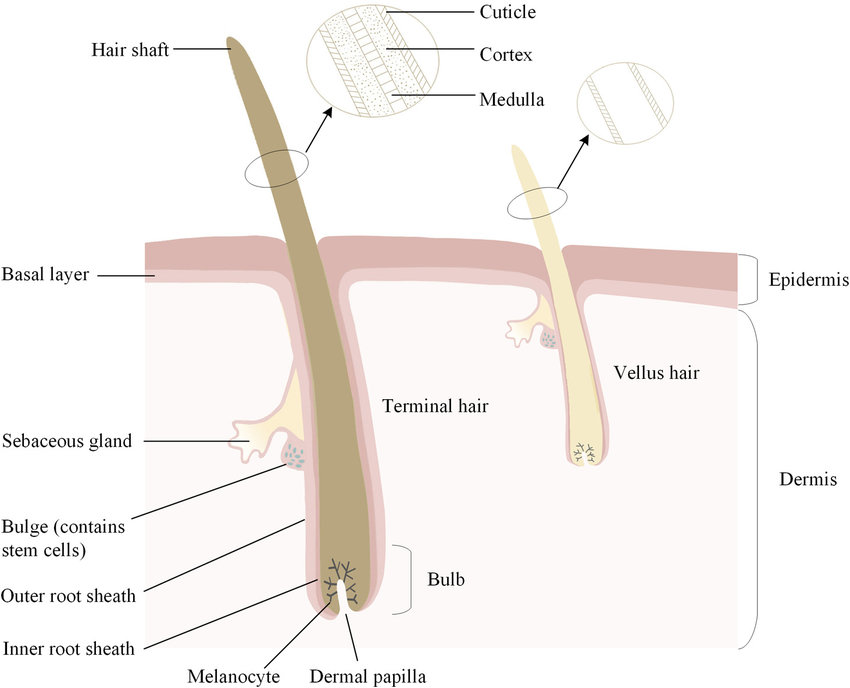
Hair is the fastest growing tissue the body produces so it deserves all your best efforts to encourage strong regeneration. Many people focus on what they put on their hair to solve challenges. They miss the most important step and that is to start from the beginning. For healthy hair, you start with the root, deep in the dermis of the scalp. The only way, or I should say, the best way to get to the root is to be intentional with the food you eat.

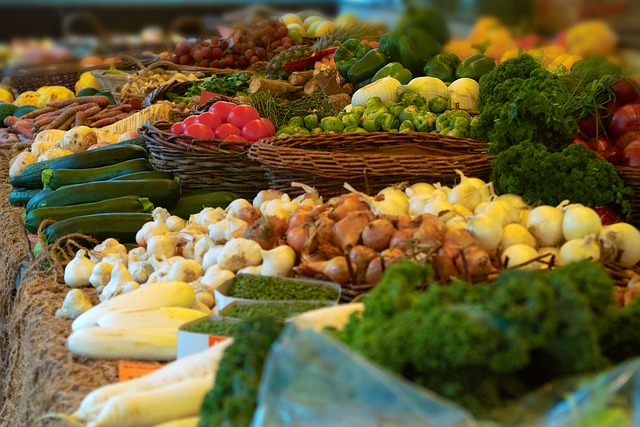
The best way to support strong healthy vibrant hair is with what you nourish your body with. These whole foods are packed with nutrients that have been known to be particularly beneficial for vibrant strong hair. Your body will extract the nutrients it desperately needs as long as you are supplying the raw material in whole plant foods.

Iron – If you really want to get to the root, you can’t beet getting to the very blood that supplies oxygen to the root of the hair follicle. Iron improves circulation thereby improving oxygen delivery to encourage hair growth.

  • Spinach
  • Legumes – beans, lentils, chickpeas, peas, and soybeans
  • Pumpkin Seeds
  • Quinoa
  • Broccoli
  • Dark Chocolate
  • Apricot
  • White Mushroom
  • Leeks
  • Acorn Squash
  • Cashew

Omega 3 – An anti-inflammatory that promotes healthy shine and opens hair follicles to encourages hair growth.

  • Flax seed
  • Chia Seeds
  • Hemp Seeds
  • Walnuts
  • Soybeans
  • Seaweed, nori, spirulina, chlorella, and other algae
  • Brussels Sprouts
  • Kale
  • Purslane

Vitamin A – Vitamin A is the growth vitamin. It also helps the sebaceous glands create sebum to moisturizer the scalp and the hair follicle.

  • Orange and yellow vegetables and fruits
  • Sweet Potato
  • Carrots
  • Black Eyed Peas
  • Spinach
  • Broccoli
  • Mango
  • Red Bell Pepper
  • Cantaloupe
  • Apricots
  • Pumpkin
  • Butternut Squash
  • Pink Grapefruit

Vitamin B – For B-12, you need to take a supplement pill. Also known as biotin, vitamin B is best known for hair growth.

  • Leafy greens like Spinach, Collard greens, Turnip greens, Romaine lettuce
  • Legumes like Black beans, Chickpeas, Green Peas, Kidney beans, Lentils, Pinto beans
  • Sunflower seeds
  • Oranges
  • Whole Grains
  • Sweet Potato
  • Banana
  • Lentils
  • Carrot
  • Almond
  • Avocado

Vitamin C – The powerhouse antioxidant that is crucial for regeneration and to protect against free radicals. It is a keystone in your body’s ability to create collagen. It also helps the body to absorb Iron, a necessary mineral for hair growth.

  • Spinach, Kale, Mustard Greens,
  • Broccoli
  • Cauliflower
  • Pumpkin
  • Guava
  • Citrus fruits
  • Strawberry
  • Guava
  • Sweet and White Potatoes
  • Tomatoes
  • Bell Peppers
  • Brussels Sprouts
  • Rose hips
  • Kiwis

Vitamin E – Repair and restore scalp as well as strong antioxidant that helps you maintain sturdy hair growth.

  • Sunflower Seeds
  • Almonds
  • Avocados
  • Spinach
  • Butternut Squash
  • Kiwifruit
  • Broccoli
  • Swiss Chard
  • Beet Greens
  • Olive
  • Wheat germ
  • Pine nuts
  • Mango
  • Turnip greens

Zinc – Supports hair growth and repair. It also helps keep the sebaceous glands functioning at peak performance.

  • Pumpkin Seeds
  • Legumes – beans, lentils, chickpeas, peas, and soybeans
  • Hemp Seeds
  • Squash
  • Sesame seeds
  • Pine nuts
  • Peanuts
  • Cashews
  • Almonds
  • Whole grains – wheat, quinoa, rice, and oats
  • Dark Chocolate
Posted on

No Poo Hair Care

First a little history

The birth of commercial liquid shampoo, the way many of us have been raised with and taught, is fairly new. The first commercial bottled liquid shampoo, similar to what we know today, was introduced around 1927 in Europe and was developed by a German Chemist. It really took off in the 30’s when Procter & Gamble brought us Drene with the first synthetic surfactants (yes it’s detergent), removing any trace of the natural soap from shampoo.

Enter the post World War II era and the age of super convenient products and bottled shampoo was off to the races. Cheap to manufacture and easy to shelve, shampoo became a very lucrative business. Especially when super models started to convince us we needed to shampoo several times a week.

What the heck is No Poo?

It is a method of cleansing the scalp and hair without using bottled shampoo. No Poo is not really new, but it it started to experience a resurgence of interest for the community concerned about the global impact of the waist from plastic detergent bottles. The battle cry to “Ditch the Bottle” is a valiant attempt to turn the tide on global warming and environmental destruction by creating less waist.

The other benefit is the huge cost savings since the ingredients are fairly inexpensive and many of us can find them in our kitchen cupboards. No Poo just means no shampoo so even just washing with plain water is considered No Poo. You cannot get easier than that. I’ve never tried it and I don’t know anyone who cleans their hair with only water. The closest I got was when I developed the Hair Hydro’s and those worked fine for a time and I still use them on a regular basis as a natural detangler to moisten my hair before brushing or styling.

The most common No Poo treatment is to use a combination of baking soda followed by an apple cider vinegar (ACV) rinse. The baking soda is the chemical used to break up oil and debris that may be close to the scalp and tangled in your hair follicles. The ACV rinse is there to neutralize the soda and soften the hair.

Before you get started, this is what you will need on hand:

  • Plenty of fresh flowing water to rinse with. You’ll be rinsing more than once.
  • Towel to pat dry your hair after
  • Baking soda
  • ACV (Apple Cider Vinegar) Personally I only use Bragg’s ACV it has a solid reputation you can trust
  • If you plan on washing in the shower: Plastic spray bottles or plastic tall cups to pour from. If you are basin washing, then glass jars work just fine. I will never recommend glass in the bathroom and never in the shower.

The Baking Soda & ACV No Poo Method. Use it only 1 time a week. Why? Because that is all you really need but also because it can be a bit harsh if used to often. Use the water only or our Hair Hydro’s in between to help keep a fresh clean feeling through the week. You could also try a dry shampoo.

  1. Dilute the Baking soda in water

    Mix this in the spray bottle, pouring cup, or glass jar you will be using
    Start with a 1 Tablespoon baking soda to 1 cup water ratio. If you have super oily hair, you may increase the amount of baking soda.
    The purpose of the baking soda is to break up the oil close to the scalp. That is what alkali’s do, break up acids.

  2. Dilute the ACV in water

    Mix this in the spray bottle, pouring cup, or glass jar you will be using
    I have found a 1 part ACV to 4 part water ratio works best for me. You could experiment with this if you feel you want more kick then try 1 to 3 part ratio.
    The purpose of this step is to neutralize any residual baking soda, balance your PH level, and to soften the hair.

  3. Step in the shower or wrap a towel on your shoulder

    Personally I prefer to just step into the shower but maybe you don’t want to or you can’t for some reason, you can wrap a towel on your shoulder to catch and drizzle.

  4. Apply the baking soda and water to your scalp

    Either pour or spritz the Baking soda dilution to your scalp and massage it a bit. You want to work it over your entire scalp to get the oils loosened up. You do not need to cover your hair shaft, in fact avoid covering the hair shaft.

  5. Rinse generously

    You want to remove any remnants of of the baking soda

  6. Spritz or pour on the ACV

    Now this one you want to get to your scalp and all the way out to the tips of your hair. A good drenching is in order. Don’t panic about the smell, it really will fade. Massage it in and give it a few moments before rinsing it out.
    If you are basin washing your hair, apply the ACV and wrap the hair up for a steam treatment before removing. I would shorten the steam time to 10 minutes. You could experiment with going longer if you want.

  7. Rinse generously

    Rinse out the ACV dilution. This will help remove some of the scent but as your hair drys, more of the scent will fade.

  8. Style and go!

    If you are really worried about the scent, you could use our Hair Hydro or one of our Aromatic Mists to add a natural scent.


We are not your Doctor

The Très Spa website may contain articles on science, or medical topics; however, no warranty is made that any of the articles are accurate.There is absolutely no assurance that any statement contained or cited in an article touching on science or medical matters is true, correct, precise, or up-to-date. The overwhelming majority of such articles are written, in part or in whole, by nonprofessionals. Even if a statement made about science or medicine is accurate, it may not apply to you or your symptoms.

The information provided at Très Spa is, at best, of a general nature and cannot substitute for the advice of a medical professional (for instance, a qualified doctor/physician, nurse, pharmacist/chemist, and so on). None of the individual contributors, nor anyone else connected to Très Spa can take any responsibility for the results or consequences of any attempt to use or adopt any of the information presented on this web site.

Nothing on Très Spa’s site or included as part of any project or product of Très Spa, should be construed as an attempt to offer or render a medical opinion or otherwise engage in the practice of medicine.

Posted on

Why do we have hair?

About 5 million hair follicles cover the average human body from the time of birth. In fact, there is little surface area that doesn’t have hair of some kind. The souls of our feet, the palms of our hands, lips, belly buttons, scar tissue are all void of hair. Considering how much of it we have, it must serve some kind of purpose right?!

Type & Location Determine Function

There are two types of hair, just two. They may seem varied and different based on the location but there really is on two types. The first is the one that covers our entire body head to toe and that is Vellus hair. It is distinguished by it’s appearance (or lack of). The hair is often barely noticeable since it is short, super thin and so slight in color.

The other type of hair is Terminal hair. This is the hair we see, it’s quite visible. It’s the type of hair on our head, over our eyes as our eye brows, eye lashes, nose hairs, etc. You get the idea. Terminal hair is very visible. Vellus hair may be replaced with Terminal hair as we mature. For example; leg hair, chest hair, face hair all start to change as we reach puberty. Some may be coarse or even curly while other terminals may be straight.

So what is all that hair for?

Turns out hair is more than just a pretty accent for your charming good looks. Those locks, and the rest of your hair, serves a purpose. Some of the functions our hair has are;

  • Thermal protection – In the cold, our hair on our head helps hold the heat in. On the body, when a cold breeze brushes the skin, the hair follicles retract and tense as a way to conserve heat and protect the skin.
  • Natural air-conditioner – When we sweat the hair traps the water and the breeze catches and it cools the water, thereby cooling the skin.
  • Traps dust and particles – Nose hair, eye lashes and eye brows help trap dust and fine particles.
  • Prevents friction – Hair can stop the friction caused by skin to skin action like running or walking.

We are not your Doctor

The Très Spa website may contain articles on science, or medical topics; however, no warranty is made that any of the articles are accurate.There is absolutely no assurance that any statement contained or cited in an article touching on science or medical matters is true, correct, precise, or up-to-date. The overwhelming majority of such articles are written, in part or in whole, by nonprofessionals. Even if a statement made about science or medicine is accurate, it may not apply to you or your symptoms.

The information provided at Très Spa is, at best, of a general nature and cannot substitute for the advice of a medical professional (for instance, a qualified doctor/physician, nurse, pharmacist/chemist, and so on). None of the individual contributors, nor anyone else connected to Très Spa can take any responsibility for the results or consequences of any attempt to use or adopt any of the information presented on this web site.

Nothing on Très Spa’s site or included as part of any project or product of Très Spa, should be construed as an attempt to offer or render a medical opinion or otherwise engage in the practice of medicine.

Posted on

The Best Way to Remove Makeup

A good daily cleansing routine will help you maintain your skins luster and regenerative abilities. It can help you fight back the aging effects.

Whether you wear a little or a lot, you’ll need to remove that makeup every day. If you go to bed with makeup on, you run the risk of causing breakouts from clogging pores. Not to mention the mess you’ll make on your pillow case.

But even if you don’t wear any makeup at all, you will still expose your face to the daily grime from air pollution, dirt, hand contact, and dead skin cells to name a few. All of this can build up and cause your pores to clog and your skin to look dull and tired.

Just how many times a day should you wash your face? Once, twice, three times?

Once is enough, twice is okay but not required, three times is bordering on an obsession. The main thing is to make sure you are using a cleansing agent that is effective enough to wash away the debris yet mild enough that it wont strip your skin. Your face should feel fresh and hydrated.

We recommend washing with soap once a day before bed and using a toner to refresh in the morning before applying your moisturizer.

What to do about eye makeup

Eye make up can be a great deal more intense to deal with and a bit of a challenge when you try to remove it. It’s made to go on and stay on looking fresh all day. It needs to look flawless even though we blink 10 to 20 times per minute. Not to mention the fact that we want a mascara that wont run dark streaks down our cheeks at the first tear. So you can imagine that makeup this long lasting will not be easy to remove.

You could try it with soap but I would not recommend that as my first pick. First, you don’t want to get soap in your eye as it may cause stinging irritations. Secondly you should never rub your eye as this pulls and tugs and stretches the skin which is counter productive if you are wanting to naturally fight off wrinkling.

Another option are the litany of synthetic specialized and often overpriced concoctions focused on eye makeup remover. But there may be a better way.

We recommend you give nature a try and use a more planet friendly approach. Use your favorite oil or one of the Très Spa Naked oil or our Hair oil, or just grab your favorite oil out of the kitchen cabinet. Follow these simple steps:

  1. Oil up a cotton round or a fabric cloth

    You can find organic cotton rounds or you may choose to use washable cloths. I would suggest a bamboo or organic cotton.

  2. Gently press to the eye

    You’ll want to press the oil to the eyelid and lashes to let it work with the makeup. Give it a gentle wiggle to get into all of the cracks and creases.

  3. Gently swipe down

    With a rolling motion, gently wipe down and out.

  4. Repeat steps 1 through 3

    Depending on how much makeup you have on, you may need to repeat a few times.

  5. Wash face with mild soapy water

    Now that you have liberated your face, it’s time to wash away any residual oil and any remnants of makeup left behind.


We are not your Doctor

The Très Spa website may contain articles on science, or medical topics; however, no warranty is made that any of the articles are accurate.There is absolutely no assurance that any statement contained or cited in an article touching on science or medical matters is true, correct, precise, or up-to-date. The overwhelming majority of such articles are written, in part or in whole, by nonprofessionals. Even if a statement made about science or medicine is accurate, it may not apply to you or your symptoms.

The information provided at Très Spa is, at best, of a general nature and cannot substitute for the advice of a medical professional (for instance, a qualified doctor/physician, nurse, pharmacist/chemist, and so on). None of the individual contributors, nor anyone else connected to Très Spa can take any responsibility for the results or consequences of any attempt to use or adopt any of the information presented on this web site.

Nothing on Très Spa’s site or included as part of any project or product of Très Spa, should be construed as an attempt to offer or render a medical opinion or otherwise engage in the practice of medicine.

Posted on

How to create a steam treatment

My favorite treatment room in the spa is the steam room. I always love to get to the spa earlier than my massage appointment so I can bounce between the sauna and the steam room. If you have ever spent any time in one, then you know the way it makes you feel. Some benefits of steaming are increases in circulation, removes toxins below the surface, relaxes the muscles, relieves stiff joints, releases stress, and opens sinuses. And the benefits of steaming extend to our entire body.

You don’t have to have a special room built or invest in expensive equipment to be able to experience your own mini steam treatment at home. All you need is a little heat and a little ingenuity!

Face Steam

Time needed: 25 minutes

A little steam action may be just what you need to help open those pores and soften any trapped debris. It’s also a great way to relax and unwind with some aroma therapy. There are a couple of different techniques you could use to do this. Steam bowl or Towel wrap. Both work well.

  1. Gather up the tools you will need

    All you need is warm to hot water, clean towels – I like tea sized or super soft washcloths for wrapping my face, and a bowl big enough to either soak your tea size towels in or hold your face over for steaming.
    Do you want to add aroma therapy to your steam? Here is where you can really have some fun! What about adding some essential oils or botanical plant matter to your steam.

  2. Boil water

    Here is where you can really have some fun! What about adding some essential oils or botanical plant matter to your steam? Why have just plain water when you can spruce it up a bit, maybe even with a bit of Spruce! Place a couple of drops of essential oils or about a 1/4 to 1/2 a cup of plant material in a bowl and pour in the boiling water.

  3. Wrap or Hover Choose one

    If you decide to Wrap – simply submerge your towels in the herb infused water to soak it through. Wring out excess water, now lay back and wrap the towel around your face. I also like to drape my neck and décolleté. If your towels get cold or you want more time, you can reheat them in the microwave.
    If you decide to HoverPlease make sure to close your eyes before you hover over the bowl! While the steam is rising, hover your face over the bowl and cover your head with a towel big enough to create a tent over you and the bowl, trapping the steam inside.

  4. Rest for 20 minutes

    It takes a little bit of time for the steam to soften your skin so spend at least 20 minutes steaming. Once you are done, you could follow with a cooling mist or simply moisturize.

Hair Steam

Lock in hydration with a little steam action. A good steam will amplify your deep condition and help you support soft strong hair. Steam heat also can help with scalp circulation and encourage growth. If you have damaged hair or scalp, you may want to try this once a week but no more than two times. Too much water can actually dilute your natural defenses and turn around to weaken your hair. It’s a good example of too much of a good thing is not so good.

Time needed:15 to 30 minutes

  1. Start with moist hair – Steam comes for heat and water so you’ll want to start with damp hair. For a water steam, either wash your hair with our Organic Shampoo or dampen your hair with one of our planet friendly Hair Hydros.
  2. Add Botanical Power – Mask, Oil, or Infusion. Coat your hair with the nourishment of your choice from root to tip.
  3. Cap it to activate – In order to create heat you need to wrap or cap your hair under some form of protection that will allow heat to build a little. Personally I like towels when my hair is short because they still let air in and out but you could use a shower cap. This is what I use under the towel when my hair is long. It’s the only way to make sure the heat and the treatment gets to all of my hair.
  4. Steam it – 20 minutes is all you really need for all the magic to happen. A little more or a little less is fine.
  5. Unwrap – Unwrap your steam treatment and either rinse out or wash out the mask, oil, gel or botanical. If you opted for a water only infused steam treatment then you really do not need to wash it out. In fact you can just dry your hair, style it and go.

Body Steam

It’s hard to replicate the steam room at home, even harder to replicate a sauna. My recommendation is to head out to the spa for this. You can always purchase a day pass to just use the facilities. Some of the most common benefits of steam rooms are reduces stress, relaxes muscles, improved circulation which reduces blood pressure, helps purge toxins, and softens skin which helps the skin repair itself naturally. Turns out, there are some things you can do at home that emulate the benefits of a sauna.

Personally I found that there is nothing better than a lovely shower or a scrumptious bath to make me feel amazing inside and out. I have tried several of the at home treatments and I have found nothing better than a simple bath with Très Spa tub treats or a soothing shower with an organic soap and an added bonus of one of our amazing body scrubs.

  • Steamy Shower – The easiest and least time consuming of any of the at home sauna solutions is the shower. To make it even more spa quality and to make you feel like you are at the sauna, I recommend you use the Invigorate Aromatic mist to add the opening aromatic essential oils, alternatively you could use one of the fizzes as a shower fizz. Just remember to step carefully as it may make the shower floor slippery. To use the mist, simply spray a washcloth and hang it in the shower where the heat and steam can get to it but it is safe from the water stream. You don’t want to wash it down the drain. You could also spray the shower curtain.
  • Steam Bath– This is my favorite treat. A nice long warm bath with aroma therapy works wonders for you Mind, Body, & Spirit. Start out with a bath that is as hot as you can handle since you want to be able to stretch out and relax for 20 minutes. I add the milk bath for the essential fats in the coconut milk and the minerals in the salts for skin nourishment, detoxification, and muscle relaxation. I use the bath fizzies for additional minerals, skin softening, and aroma therapy. I really doesn’t get any better than this! You can find all of the ones I use in our bath collections line.
  • Sauna Suit – These are suits you wear. There are a couple of types out there. One looks like silver jogging suits with elastic cuffs so the only parts that stick out are your feet and hands and your head and neck. The other is made of neoprene. They work by trapping in heat causing you to sweat and simulating a steam sauna. Typically used to reduce but what you really lose is just water. The benefit for the skin is the same as spending time in the spa. These suits can be used over and over again as they are easy enough to wash. This is what I use when I want to do a herbal body mask.
  • Wraps – These are isolation or full body wraps that people may use to target a specific area of the body. Typically used to reduce but what you really lose is just water. A full body mineral wrap is an amazing treatment you can get at a spa but not one easy to replicate at home. It involves covering your body head to toe in a body mask then covering that with a wrap. I’ve had treatments that used warm wet organic cotton and ones where they used something like a saran wrap (not very planet friendly). Both work but I have never tried to even try to attempt this on my own. I save this treatment for a visit to the spa. You could do it, but why bother? Why not just indulge yourself with a spa day?!